Exercise #0 -- Installing Geant4
and Quick Tour
The goal of this first exercise is to get Geant4 installed and to be able to
run some simple simulation, analysis and visualization code. In later exercises
you will work through the code and understand what is going on in much more detail.
We have written explicit instructions for installing and compiling Geant4
from source for this CD. In addition for the supported platforms we have
included pre-compiled versions of Geant4. If you have time it is more
instructive and more reliable to compile everything yourself from scratch, but
this takes one or more hours, so if you are trying to follow the tutorial in a
limited time you might want to try the pre-compiled versions.
The instructions for building from source are available for the following
platforms:
For other platforms you should consult the official
Geant4 installation instructions,
plus the overview of Geant4 files
on this CD.
The instructions for using pre-compiled versions are available for:
Note: For the tutorial we will also provide instructions for running
on the fnalu Linux cluster. Please look for these instructions at the time of
the workshop on the errata
page.
Example A01
Before explaining how to compile the example it is useful to understand the
detector modeled by the example:
Geometry
The spectrometer consists of two detector arms. One arm provides position and
timing information of the incident particle while the other collects position,
timing and energy information of the particle after it has been deflected by a
magnetic field centered at the spectrometer pivot point.
- First arm: box filled with air, also containing:
- 1 hodoscope (15 vertical strips of plastic scintillator)
- 1 drift chamber (5 horizontal argon gas layers with a "virtual wire" at
the center of each layer)
- Magnetic field region: air-filled cylinder which contains
the field
- Second arm: box filled with air, also containing:
- 1 hodoscope (25 vertical strips of plastic scintillator)
- 1 drift chamber (5 horizontal argon gas layers with a "virtual wire" at
the center of each layer)
- 1 electromagnetic calorimeter:
- a box sub-divided along x,y and z axes into cells of CsI
- 1 hadronic calorimeter:
- a box sub-divided along x,y, and z axes into cells of lead, with a
layer of plastic scintillator placed at the center of each cell
Physics
This example uses the following physics processes:
- electromagnetic:
- photo-electric effect
- Compton scattering
- pair production
- bremsstrahlung
- ionization
- multiple scattering
- annihilation
- decay
- transportation in a field
and defines the following particles:
- geantino
- charged geantino
- gamma
- all leptons
- pions
- charged kaons
Note that even though hadrons are defined, no hadronic processes are invoked
in this example.
Event
An event consists of the generation of a single particle which is transported
through the first spectrometer arm. Here, a scintillator hodoscope records the
reference time of the particle before it passes through a drift chamber where
the particle position is measured. Momentum analysis is performed as the
particle passes through a magnetic field at the spectrometer pivot and then into
the second spectrometer arm. In the second arm, the particle passes through
another hodoscope and drift chamber before interacting in the electromagnetic
calorimeter. Here it is likely that particles will induce electromagnetic
showers. The shower energy is recorded in a three-dimensional array of CsI
crystals. Secondary particles from the shower, as well as primary particles
which do not interact in the CsI crystals, pass into the hadronic calorimeter.
Here, the remaining energy is collected in a three-dimensional array of
scintillator-lead sandwiches.
Several aspects of the event may be changed interactively by the user:
- initial particle type
- initial momentum and angle
- momentum and angle spreads
- type of initial particle may be randomized
- strength of magnetic field
- angle of the second spectrometer arm
Detector Response
All the information required to simulate and analyze an event is recorded in
HITS. This information is recorded in the following sensitive detectors:
The tutorials on this CD are all based on Geant4 example A01. Although there
is a version of this example included with the Geant4 source code, it is not the
same as the A01 example used for the following examples. In fact we have a
different version of the A01 example as the starting point for each exercise, so
be sure to start with the appropriate version from this
directory on the CD.
To build the example, simply change directory to the location where you
unpacked the A01 example, and issue the command "make", e.g.
cd A01
make
If all goes well you should see output similar to this:
$ make
Making dependency for file A01app.cc...
Making dependency for file src/A01TrackingAction.cc ...
Making dependency for file src/A01PhysicsList.cc ...
Making dependency for file src/A01MuonPhysics.cc ...
Making dependency for file src/A01MagneticField.cc ...
Making dependency for file src/A01IonPhysics.cc ...
Making dependency for file src/A01HadronPhysics.cc ...
Making dependency for file src/A01EventActionMessenger.cc ...
Making dependency for file src/A01EventAction.cc ...
Making dependency for file src/A01EMPhysics.cc ...
Compiling A01AnalysisManager.cc ...
A01AnalysisManager.cc
Compiling A01DetectorConstruction.cc ...
A01DetectorConstruction.cc
Compiling A01DriftChamber.cc ...
A01DriftChamber.cc
Compiling A01DriftChamberHit.cc ...
A01DriftChamberHit.cc
Compiling A01EMPhysics.cc ...
A01EMPhysics.cc
Compiling A01EmCalorimeter.cc ...
A01EmCalorimeter.cc
Compiling A01EmCalorimeterHit.cc ...
A01EmCalorimeterHit.cc
Compiling A01EventAction.cc ...
A01EventAction.cc
Compiling A01EventActionMessenger.cc ...
A01EventActionMessenger.cc
Compiling A01HadCalorimeter.cc ...
A01HadCalorimeter.cc
Compiling A01HadCalorimeterHit.cc ...
A01HadCalorimeterHit.cc
Compiling A01HadronPhysics.cc ...
A01HadronPhysics.cc
Compiling A01Hodoscope.cc ...
A01Hodoscope.cc
Compiling A01HodoscopeHit.cc ...
A01HodoscopeHit.cc
Compiling A01IonPhysics.cc ...
A01IonPhysics.cc
Compiling A01MagneticField.cc ...
A01MagneticField.cc
Compiling A01MuonPhysics.cc ...
A01MuonPhysics.cc
Compiling A01PhysicsList.cc ...
A01PhysicsList.cc
Compiling A01TrackingAction.cc ...
A01TrackingAction.cc
Compiling A01Trajectory.cc ...
A01Trajectory.cc
Creating/replacing object files in c:/geant4/geant4_5_2/tmp/WIN32-VC/A01app/libA
01app.a
Microsoft (R) Library Manager Version 6.00.8447
Copyright (C) Microsoft Corp 1992-1998. All rights reserved.

Compiling A01app.cc ...
A01app.cc
Using granular libraries ...
Linking A01app ...
Command line warning D4024 : unrecognized source file type 'c:/geant4/geant4_5_2
/tmp/WIN32-VC/A01app/exe/A01app.o', object file assumed
To run the example issue the following command:
$G4INSTALL/bin/$G4SYSTEM/A01app
After Geant4 initializes itself you will be presented with the Geant4 prompt:
Idle>
At which you can issue Geant4 commands. For example:
Idle> /run/beamOn 10
to analyze 10 events, or:
Idle> help
or even:
Idle> exit
to quit Geant4. More information on using Geant4's command prompt can be
found in the presentation on
Basics Of UI Command.
Although the tutorials in this workshop are all based on the A01 example,
there are many more examples included with the Geant4 source code, in the
examples directory.
Geant4 has powerful visualization capabilities to aid you in understanding your simulation
or to create publication quality detector images. We will now give you a very quick introduction
to Geant4 visualization so that you have it available as you work through the next few examples.
Re-run the A01 example with the following commands.
Don't worry yet about what these commands do, they will be covered in detail in the
presentation Introduction to Geant4 Visualization.
For now, just know that they will cause visualization files to be created first for an empty detector,
then for a detector with one event:
$G4INSTALL/bin/$G4SYSTEM/A01app
Idle> /vis/open HepRepFile
Idle> /vis/scene/create
Idle> /vis/scene/add/volume
Idle> /vis/sceneHandler/attach
Idle> /vis/viewer/flush
Idle> /vis/scene/add/trajectories
Idle> /vis/scene/add/hits
Idle> /tracking/storeTrajectory 1
Idle> /run/beamOn 1
This will create two ".heprep" files which work as input to
the event display application called WIRED.
This application, along with two other visualization systems called DAWN and OpenGL, will be
discussed in detail in later tutorials. For now we will just show you enough so that
you can use the WIRED Event Display to visualize your results in the next few tutorials.
WIRED is a 100 percent pure Java application that can run anywhere that
Java version 1.4.1 or newer is installed.
Users are encouraged to install and run WIRED on their desktop machines
rather than running it via x-windows from central Unix systems.
WIRED will work either way, but the best performance comes when it runs
on the desktop (and this frees central Unix CPUs for more suitable work).
Installing Java
Start by making sure you have an appropriate version of Java on your system,
a version number of 1.4.1 or greater.
You can check the version number by typing the following from a command
or cygwin window:
java -version
If you don't already have the appropriate Java:
Installing WIRED
Note that the WIRED installer does not make any changes to your registry
or other system files. You can always remove WIRED by just deleting the
single directory structure into which WIRED is installed.
So don't worry - give it a try on any machine.
To download WIRED, copy a single file of about 7M to your
own directory (it doesn't matter where you put it, the install procedure will
later ask you where you really want to install WIRED). Take the file from:
Open a command window and go to the directory where install.class is located.
Before you actually run the installer, note one thing:
-
You will be asked what directory you want to install Wired to -
do not specify a directory that has a space it its name (such as the
very common Windows directory name "Documents and Settings" or "Program Files").
Now run the installer by typing the following command:
java -cp . install
If you are running through x-windows, the install procedure may have trouble
getting the correct fonts to show the install dialog boxes.
You can instead just skip the dialog boxes by typing:
java -cp . install /p
The result will be as if you had selected all of the default options.
Wired will be installed to the directory "Wired".
Starting WIRED
The executable is in Wired's bin directory.
Run it by typing:
wired -file <file_specification>
For example:
   wired -file c:\jp\slac\geant4\G4VisTutorial\G4WIREDTutorial\G4Data0.heprep
   or
   wired -file /afs/mydir/mysubdir/G4Data0.heprep
Linux users who do not have the current directory in their Path will
need to prefix this with a dot and a slash, as in:
./wired -file /afs/mydir/mysubdir/G4Data0.heprep.gz
Cygwin users may find that they first need to do:
export WIRED_HOME=<your_top_level_wired_directory>
Windows ME users must first type:
SET OS=Windows_NT
yes, that's Windows_NT even though your actual system is Windows ME.
Windows 98 or Windows 95 users must first type:
   SET OS=W98 (or W95)
   SET WIRED_HOME=<your_top_level_wired_directory>
and then run by typing "sh wired.sh" instead of just "wired".
You should end up with an image as follows:
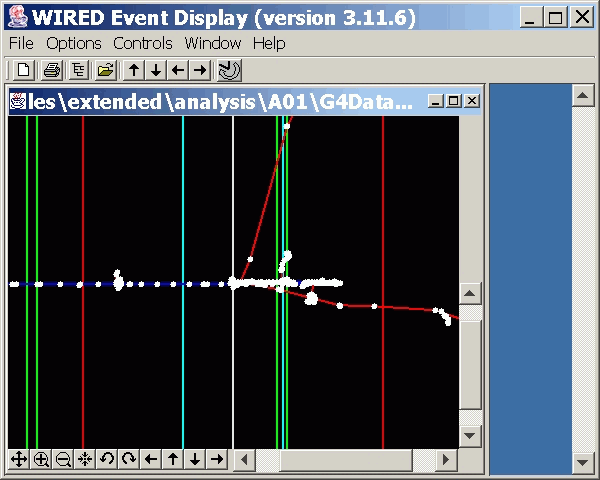
You can always quickly go to the next file produced by Geant4 by hitting the
right arrow button at the top of the window.

This "next event" button always gets the next .heprep or .heprep.gz file
alphabetically in the current event's directory.
Since each new event produced from Geant4 has a sequential heprep file name, this button
gets you the next Geant4 event.
Orientation Toolbar
The bottom of the view window contains the Orientation Toolbar.
These buttons control zoom, rotate and translation functions
(later you will learn how to also control these with various mouse drag
operations).
-
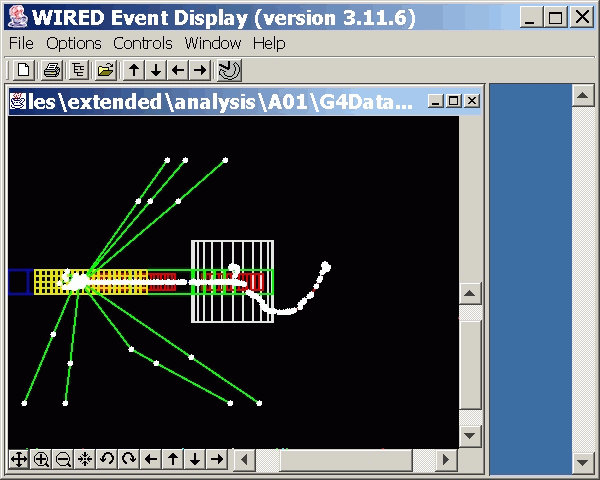
 Fit To Window adjusts scaling to make the entire image fit the window.
Try this right away to make the entire G4 example fit the current window.
You should then see the following:
the rest of the orientation toolbar
-
 Zoom In and Zoom Out.
-
 Center the image.
-
 Rotate the image around the axis perpendicular to the screen.
-
 Translate the image left, up, down or right.
-
 Rotate the image around the screen's vertical axis.
You can either click on the little arrows on either side of the slider
or you can click and drag the slider.
-
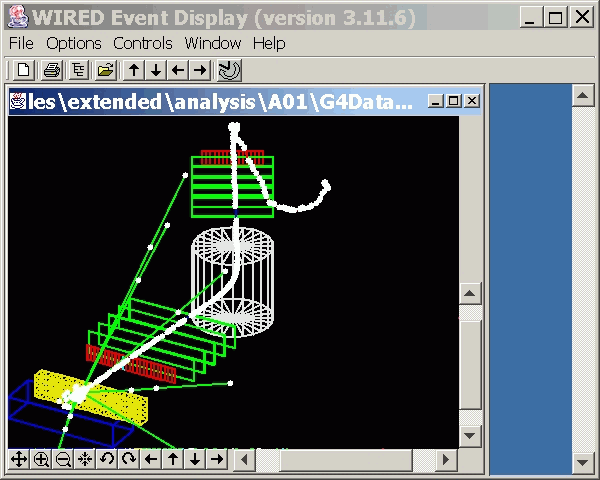
Another rotation tool to the right allows rotation around the
screen's horizontal axis.
The following shows a rotation around the screen's horizontal axis.
Orientation Actions in the Popup View Menu
To select from among some standard views, place the cursor into the window
that contains the event display and hit the right mouse button
(Macintosh users, hit control and mouse button).
You should see a new window as follows:
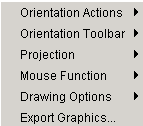
Then select "Orientation Actions", which will give the following submenu:
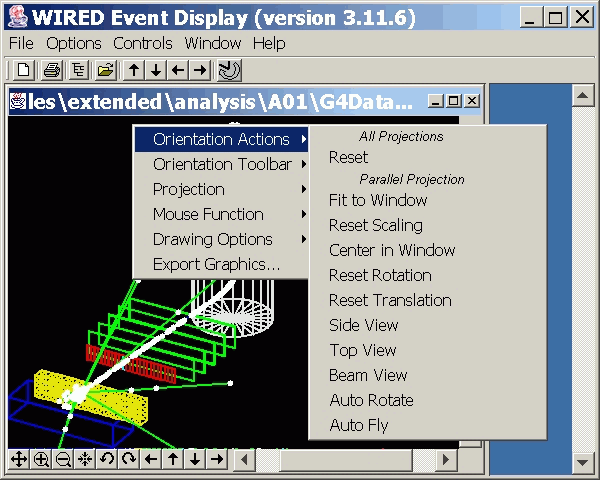
Use these options to select standard views or reset to the initial view.
"Top View", for example, will give you the following:
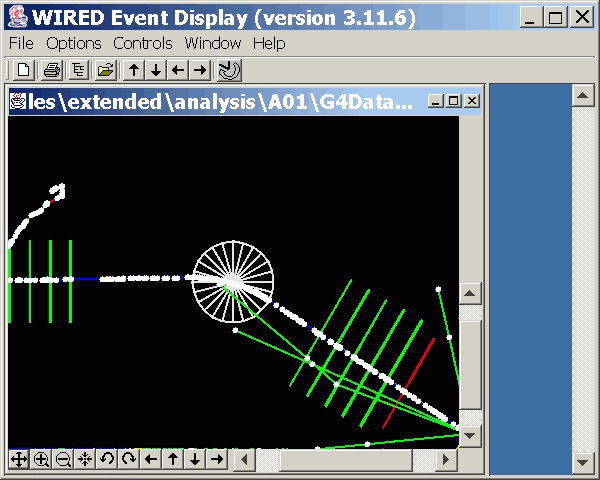
Again use the "Fit To Window" button to make the entire image fit in the
window.
The rest of the popup view menu will be discussed later.
Event Visibility Control
 use the Event Visibility Control to toggle on and off visibility of data
and detector elements.
A tree will appear at the right side of the main window.
Widen the main window a little by dragging on the window's right side.
You should then see the following:
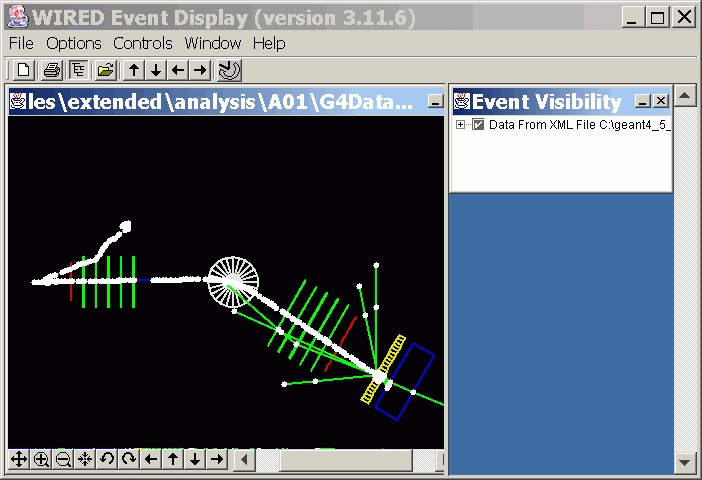
- Click on the plus signs to expand the tree.
If you expand the first level, you should then see separate items for
"Event Data" and "Detector Geometry".
- Click on the check marks to toggle items visible or invisible.
Try turning off first the Event Data and then the Detector Geometry.
Turn the Detector Geometry data back on.
- Click on the plus signs to expand the tree. Further.
Each check mark controls visibility of everything from that level of the
tree downward.
- If you see no change when you turn an item on, expand that part of the
tree and turn on the items deeper within the tree.
- To see a popup menu with more tree manipulation options,
position the cursor over a part of the tree and hit the right mouse button
(Macintosh users, hit control and mouse button).
The popup menu includes options to expand or turn on an entire tree structure
with a single action.
- Point at the line "Detector Geometry", right click, and select
"Expand All Below".
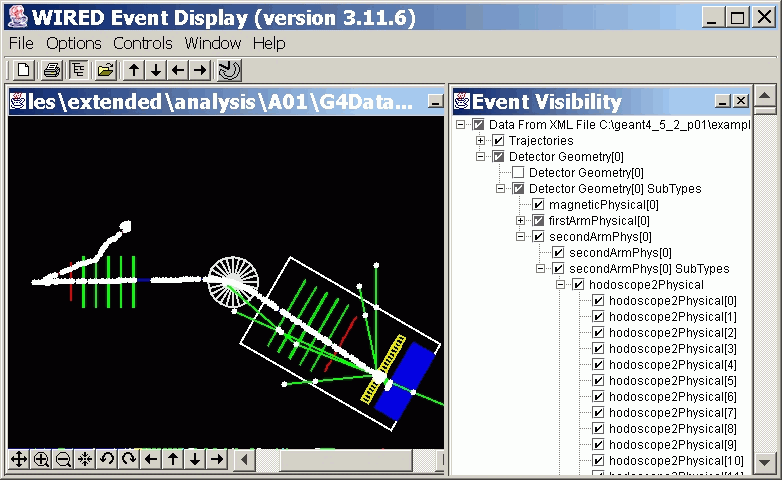
You will then see the entire detector geometry tree.
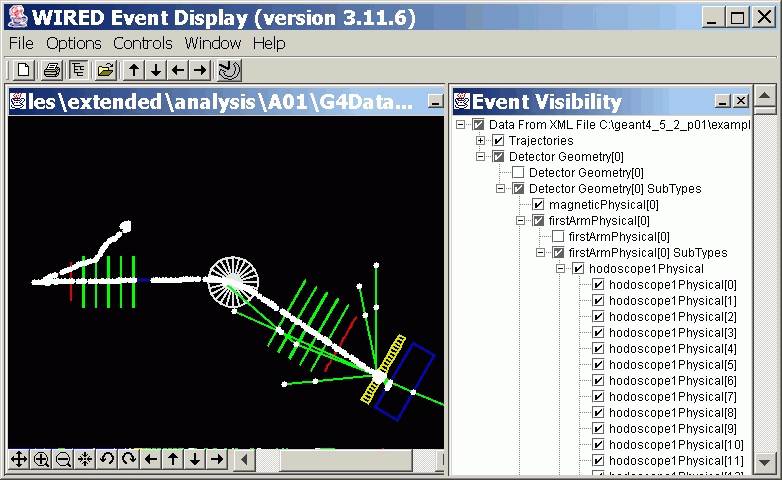
- Close the part of the tree called "firstArmPhysical".
- Point at "secondArmPhysical", hit the right mouse button and select
"Show All Below".
The Hadronic Calorimeter, depicted as the blue rectangle at the lower right,
will then have so much detail that it appears as a solid filled area
(actually a very complex set of individual calorimeter cell outlines).
Interaction Between View Window and Event Visibility Tree
Picking on objects in the view window can cause them to highlight in the
Event Visibility Tree, and the opposite is also true.
-
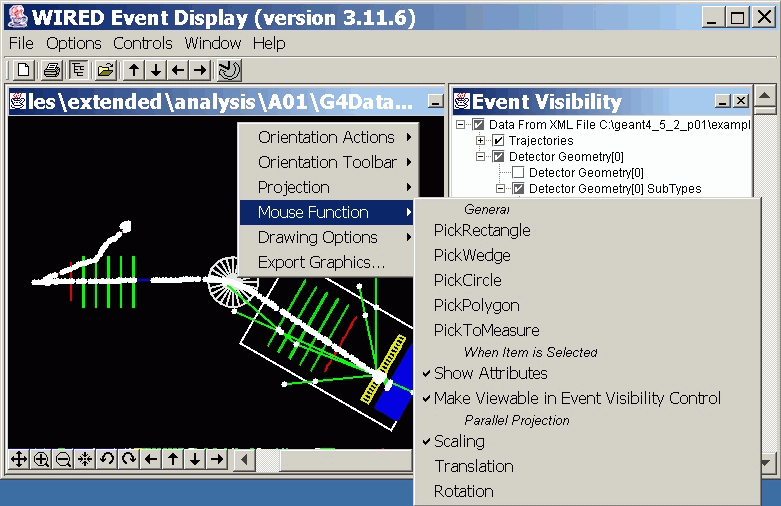
To try this, return now to the Popup View Menu by pointing at the view
window and hitting the right mouse button.
- Expand the "Mouse Function" submenu and select "Pick Rectangle".
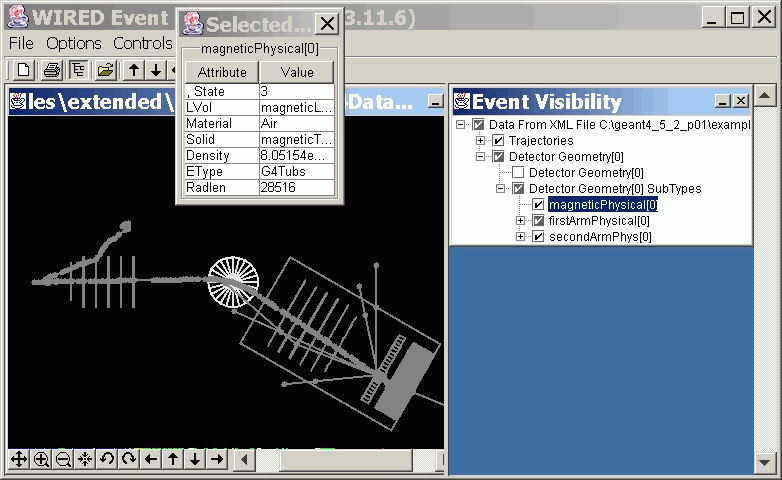
- Now click and drag with the left mouse button to select some objects
from the view. Try picking on the top part of the white circular structure at the center of the view.
- A window will pop up that tells some attributes of the picked object (it was a magnet),
the picked object will now stand out (all other objects will be dimmed)
and the corresponding object will highlight in the Event Visibility Tree.
- To undo the highlighting, pick on any empty part of the view.
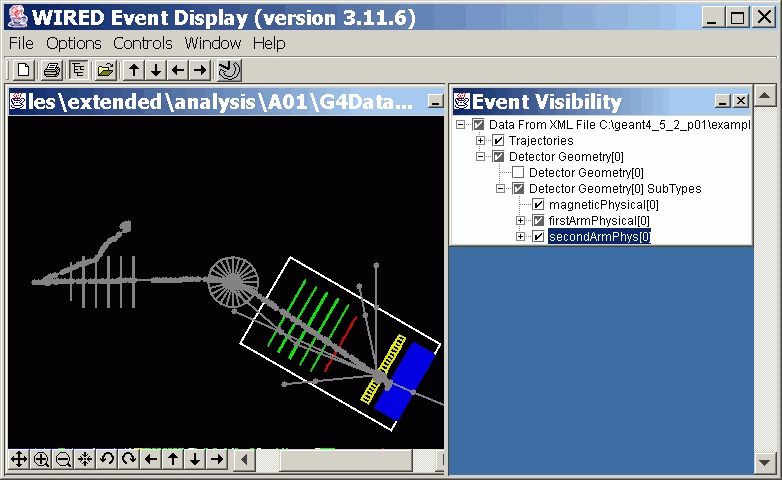
- To see the inverse of this effect, again expand the Detector Geometry part of the
Event Visibility Tree, point at its item named
"secondArmPhysical", hit the right mouse button, and select "Toggle Highlighting".
The entire secondArmPhysical should now be highlighted in the view window
(all other objects will be dimmed).
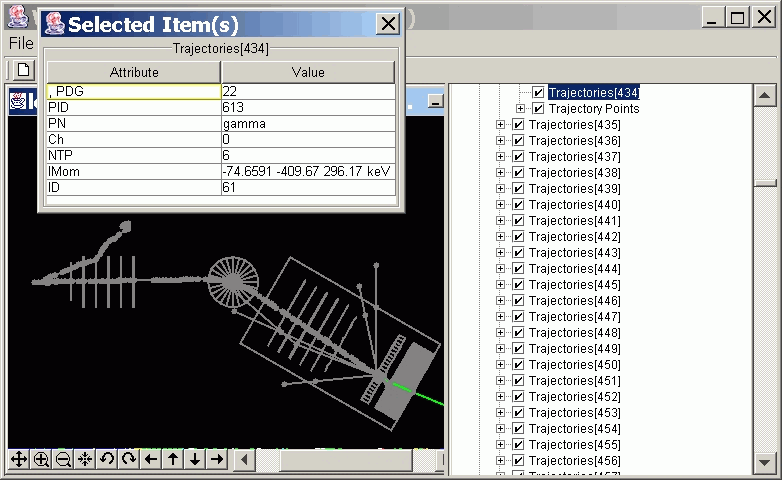
- Picking on trajectories will give you information about the selected particle.
Try picking on the trajectory that disappears off the lower right corner of the view.
You will find that this was a gamma.
Expand the popup attribute window a little (by clicking and dragging on a corner)
to read the entire momentum string.
This gamma had momentum of -74.7,-409.7,296.2 keV.
Enough on Visualization (for now)
You now know enough of the basics of Geant4 visualization to generate a .heprep file
and view the results in WIRED.
Later tutorials show more about WIRED and also talk in detail about two other visualization
systems, DAWN and OpenGL. For the purposes of the subsequent exercises, any of these three
visualization systems will do, except for two important notes about OpenGL.
At the time of this writing, OpenGL for Geant4 only works on Linux, not Windows.
But stay tuned for updates - that situation is likely to change soon (OpenGL is included
as part of the Windows operating system, but Geant4's OpenGL driver is not correctly
designed yet to take advantage of that version).
The pre-built Geant4 included with this tutorial does not include OpenGL.
This is done both to make the pre-built version more portable and to make the pre-built version
able to run with JAIDA. Unfortunately, you cannot run JAIDA if OpenGL is in your build.
-
The problem is that the OpenGL libraries pre-load the library libXt.so which makes the Java virtual
machine crash when it tries to open its first Window - expect a fix when JDK 1.5 comes out.
-
For now, you can run Geant4 with either JAIDA or OpenGL, but you cannot run with both at the same time.
Since the chances of your getting this far in the time allocated for the
tutorial seem to be zero, we have moved the introduction to analysis to the
Analysis and Visualization exercise. Feel free to
skip ahead to that exercise if you want to learn
about analysis now.

![]()
 Fit To Window adjusts scaling to make the entire image fit the window.
Try this right away to make the entire G4 example fit the current window.
You should then see the following:

 Zoom In and Zoom Out.
 Center the image.
 Rotate the image around the axis perpendicular to the screen.
 Translate the image left, up, down or right.
 Rotate the image around the screen's vertical axis.
You can either click on the little arrows on either side of the slider
or you can click and drag the slider.


