Geant4 Workshop Visualization Tutorial using the DAWN Event Display
This tutorial can be used on its own, but gives the most comprehensive introduction to Geant4 visualization when used as part of the following full set of documents:
The basic Geant 4 Tutorial had users run a basic Geant 4 job contained in
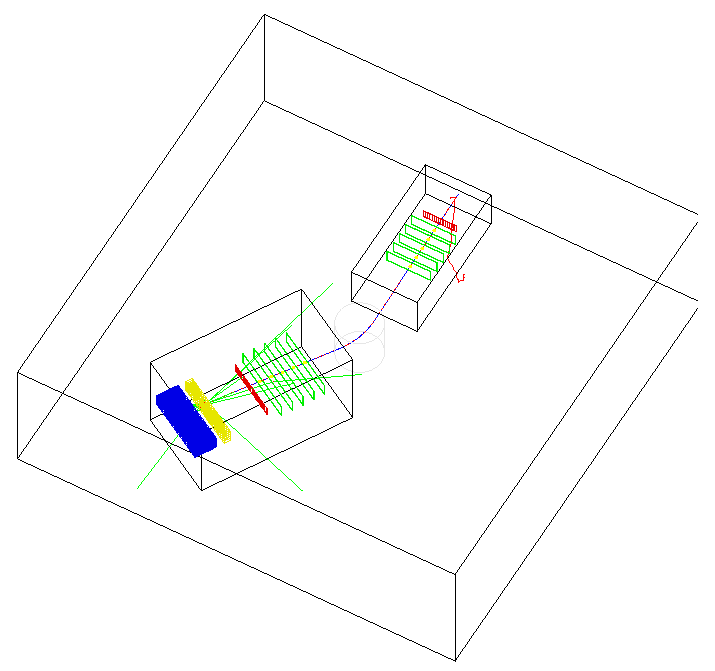
geant4/source/examples/extended/analysis/A01This job produced various kinds of output including a graphics file in a format called a .heprep file suitable for viewing with the WIRED event display. A one line change to that job will allow you to produce graphics files of a different format suitable for viewing with the DAWN Event Display. This visualization tutorial will show you how to use the DAWN Event Display to view that file (or an equivalent file included with this tutorial - see details later).
Rerun the A01 example as follows:
../bin/$G4SYSTEM/A01app
/vis/open DAWNFILE
/vis/scene/create
/vis/scene/add/volume
/vis/sceneHandler/attach
/vis/viewer/flush
/vis/scene/add/trajectories
/vis/scene/add/hits
/tracking/storeTrajectory 1
/run/beamOn 1
You will then find that you have created two ".prim" files suitable for viewing in DAWN.
DAWN's full name is "Fukui Renderer DAWN (Drawer for Academic WritiNgs)". It was created by Satoshi Tanaka as a vectorized 3D PostScript processor with analytical hidden line/surface removal intended for precise technical drawing of complicated objects. Designed specifically for Geant4, DAWN calculates all visible parts of the 3D data before drawing and then produces device-independent vectorized graphics for high quality technical applications.
DAWN is a C++ application that in turn relies on the Tcl/Tk control language
and gui toolkit. DAWN sends output for viewing either to a PostScript file, or directly to a
PostScript viewer, or to an OpenGL viewer.
Since the purpose of this tutorial is just to give you a quick feel for the
power of DAWN, this tutorial will focus on just one of those modes, the easiest
one to set up, sending output to a PostScript file.
For information on the other modes, and for more complete and up to date information on other
DAWN topics, see the DAWN Home Page at:
http://geant4.kek.jp/~tanaka/DAWN/About_DAWN.html
You don't really need to understand the details of the .prim file format to use DAWN, but in case you are interested:
The .prim file format is fairly easy to understand just by looking at it. Here are some lines from one example:
##G4.PRIM-FORMAT-2.4

##### List of primitives 1 #####
/BoundingBox -1.0  -1.0 -5.0   8.0  4.0  6.0
!SetCamera
!OpenDevice
!BeginModeling

# Box
/Origin   0.0  0.0  0.0
/ColorRGB 1.0  0.0  0.0
/Box 0.5  2.0  4.5

# Column
/Origin   4.0  0.0  0.0
/ColorRGB 0.0  1.0  0.0
/Ndiv 50
/Column 1.5  2.0

# Trd
/Origin   0.0  0.0  0.0
/ColorRGB 0.0  1.0  1.0
/Origin   7.0  0.0  0.0
/Trd      1 0.5 1 0.5 4

# Cone segment
/Origin   1.0  5.0  0.0
/ColorRGB 0.0  1.0  1.0
If you have not yet run the A01 tutorial, this might be a good time to do so.
You will then have a file called:
geant4\examples\extended\analysis\A01\g4_01.prim
You can also skip running Geant4 for now and instead find a copy of this file here.
The commands from that example that generated the .prim file were:
../bin/$G4SYSTEM/A01app
/vis/open DAWNFILE
/vis/scene/create
/vis/scene/add/volume
/vis/sceneHandler/attach
/vis/viewer/flush
/vis/scene/add/trajectories
/vis/scene/add/hits
/tracking/storeTrajectory 1
/run/beamOn 1
/vis/viewer/flush
/run/beamOn 1 my.mac
Other commands that might be useful are discussed in this document's section called Further Resources. Ignore any commands related to setting camera views, lighting or surface style. Those commands are only relevant to an immediate visualization driver such as OpenGL. When you work with a driver such as DAWN that has a 3D file format, you set these things later, from the visualizaton application, DAWN.
Free versions of Tcl/Tk and gsview are available.
Use the Tcl/Tk source code from:
The download is a tar-gzipped archive. Unzip and Untar it as follows;
gtar zxf /path/to/ActiveTcl-download.tar.gz
Run ActiveTcl-linux/install.sh, which will select between a GUI or text-based installer. It uses the GUI version when it can connect to a display (requires local X installation).
After installation, make sure that the path to the installed executables is placed on your path. (Thanks to the ActiveState company for these instructions.)
Use the Tcl/Tk source code from:
The download is a self-extracting and installing executable. It is also a ZIP file should you choose to unzip it.
Run the install.bat to install ActiveTcl. On Windows 95/98/ME, ActiveTcl will not place the tclsh and wish on your path, although it will associate .tcl files to wish.
If the ActiveTcl installer complains that it cannot find the ActiveTcl package when trying to run, it is likely that the TCL_LIBRARY variable is set in your environment (the Ruby language does this, for example). This is an unnecessary setting, and should be removed. Windows 9* users can remove the entry from their 'autoexec.bat' file, and Windows NT/2000/XP users can remove it from the Environment Settings (right click on "My Computer"; select "Properties", go to the "Advanced" tab and select "Environment Variables..."). Windows 9* users may have to reboot to force the system to recognize the change in settings. Otherwise, just restart the Explorer or DOS shell and run the self-extracting executable again. (Thanks to the ActiveState company for these instructions.)
Use the gstools source code from:
Start by reading the Readme.htm file in ghostscript-8.11.tar.gz.
The download is a tar-gzipped archive. Unzip and Untar it as follows;
gtar zxf /path/to/ghostscript-8.11.tar.gz
You will also need ghostscript-fonts-std-8.11.tar.gz (obtain and unpack the same way)
You will also need gsview-4.4.i386.tar.gz (obtain and unpack the same way)
Use the gstools source code from:
Obtain and run the self-extracting gs811w32.exe
Obtain and run the self-extracting gsv44w32.exe
Use the DAWN source code from:
Unzip and Untar the file:
   gunzip dawn_3_85e.taz
   tar -xvf dawn_3_85e.tar
You should then have a directory called dawn_3_85e. Proceed as follows:
   cd dawn_3_85e
   make clean
   make guiclean
   make
You should then see a file called simply "DAWN". DAWN is ready to run.
Use the DAWN Windows binary from:
Unzip and untar the file:
   gunzip WinDAWN385cBin.taz
   tar -xvf WinDAWN385cBin.tar
You should then have a directory called WinDAWN385cBin. This contains the executable, dawn.exe, and some related files.
Windows users need to add one more file to that directory (already included in the Linux/Unix version). Get the file prim1.prim from here.
Finally, add some more example prim files into your WinDAWN385cBin directory as follows. Take the file primdata.taz from here and insert it into your WinDAWN385cBin directory. Then unzip and untar the file:
   gunzip WinDAWN385cBin.taz
   tar -xvf WinDAWN385cBin.tar
You will now have a subdirectory called PRIM_DATA.
DAWN is ready to run.
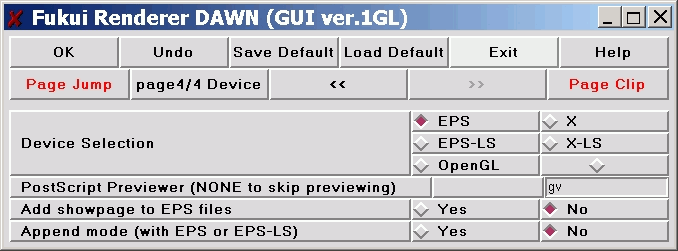
dawn prim1.prim
The console should respond with:
perl@noric10 $ dawn prim1.prim

***************************************
          Fukui  Renderer
              DAWN
 (Drawer for Academic WritiNgs)
 ver 3.85...
***************************************


***** g4.prim viewer mode (default)
***** ("dawn -h" for help)
and the DAWN window should appear:

dawn prim1.prim

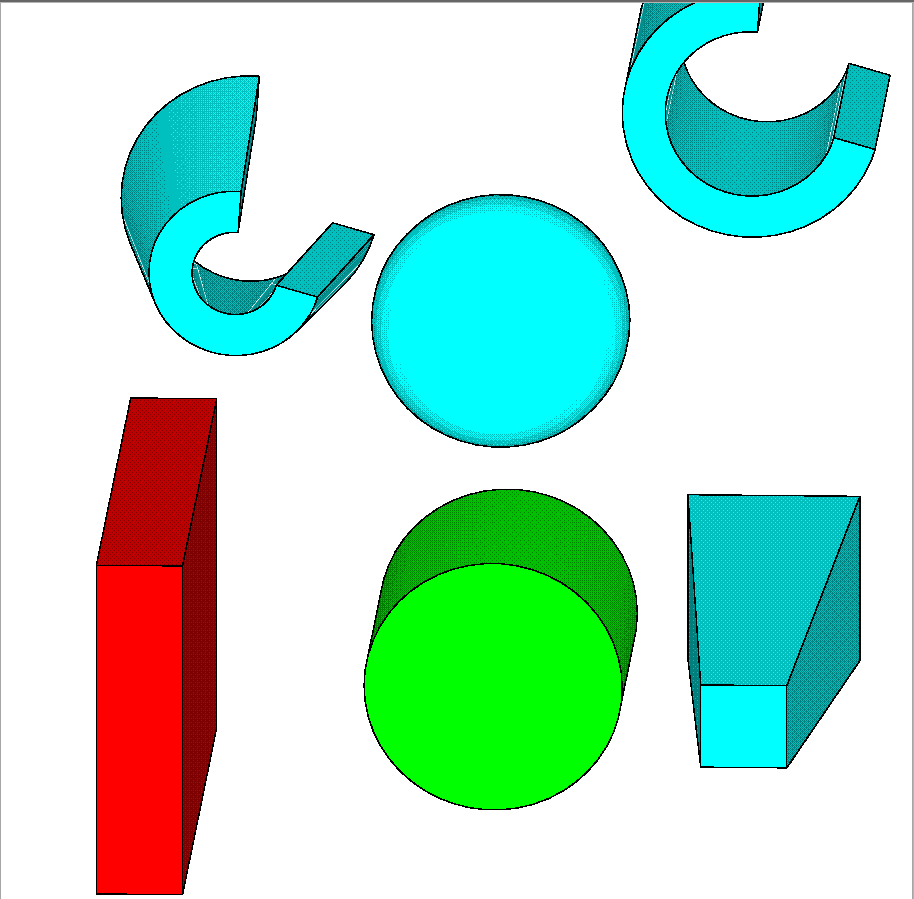


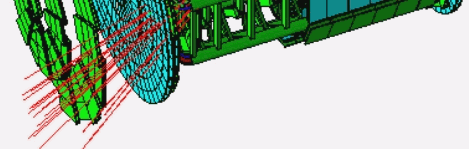
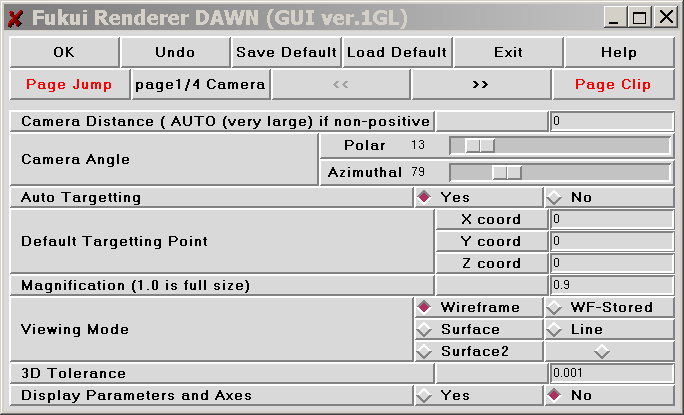
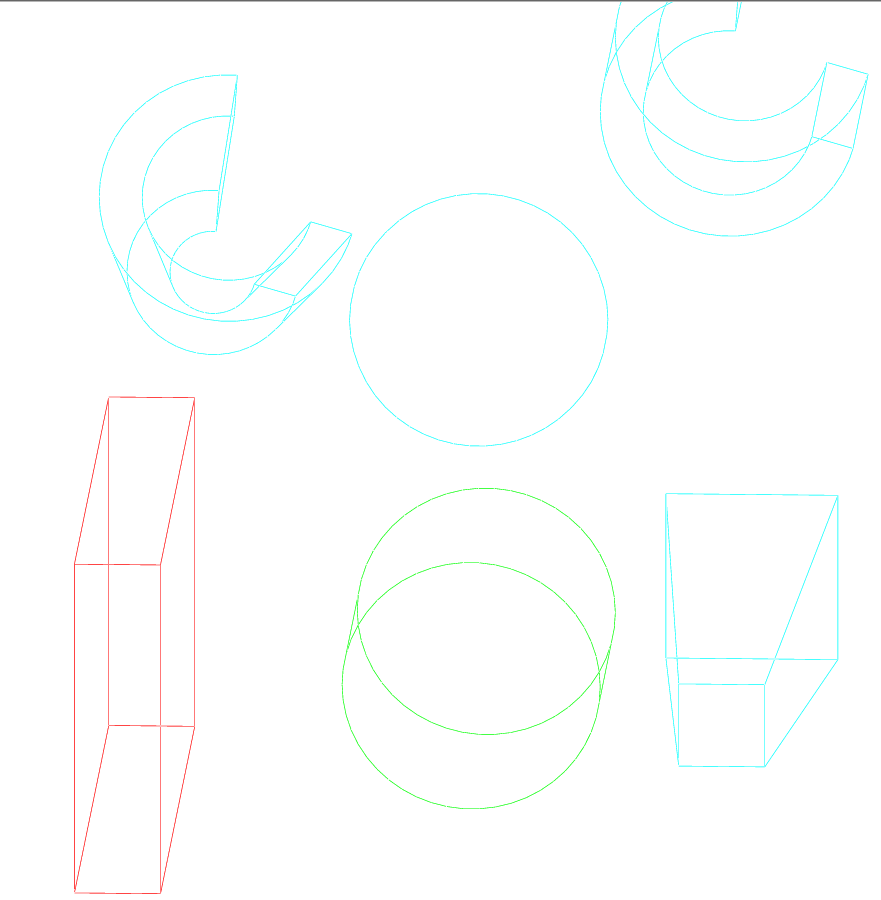
dawn PRIMDATA/pixel_cut0100.primLet the "Lighting Direction" "Polar" angle back to 13, and hit "OK".
 ***** 250  primitive are processed
 ***** 500  primitive are processed
 ***** 750  primitive are processed
 ***** 1000  primitive are processed
 ***** 1250  primitive are processed

--------------------------------------------------------------------------------

 upto OBJECT 1414 "POLYHEDRON":  Eliminating hidden parts of facets ...
--------------------------------------------------------------------------------

  ****** upto OBJECT 1414: 500 polygons are processed  ( 9 % )
  ****** upto OBJECT 1414: 1000 polygons are processed  ( 19 % )
  ****** upto OBJECT 1414: 1500 polygons are processed  ( 29 % )
  ****** upto OBJECT 1414: 2000 polygons are processed  ( 39 % )
  ****** upto OBJECT 1414: 2500 polygons are processed  ( 49 % )
  ****** upto OBJECT 1414: 3000 polygons are processed  ( 59 % )
  ****** upto OBJECT 1414: 3500 polygons are processed  ( 69 % )
***** PostScript file "PRIM_DATA/pixel_cut0100.eps" is created.

Or, if you skipped running Geant4 for now, you can instead find a copy of this file here.
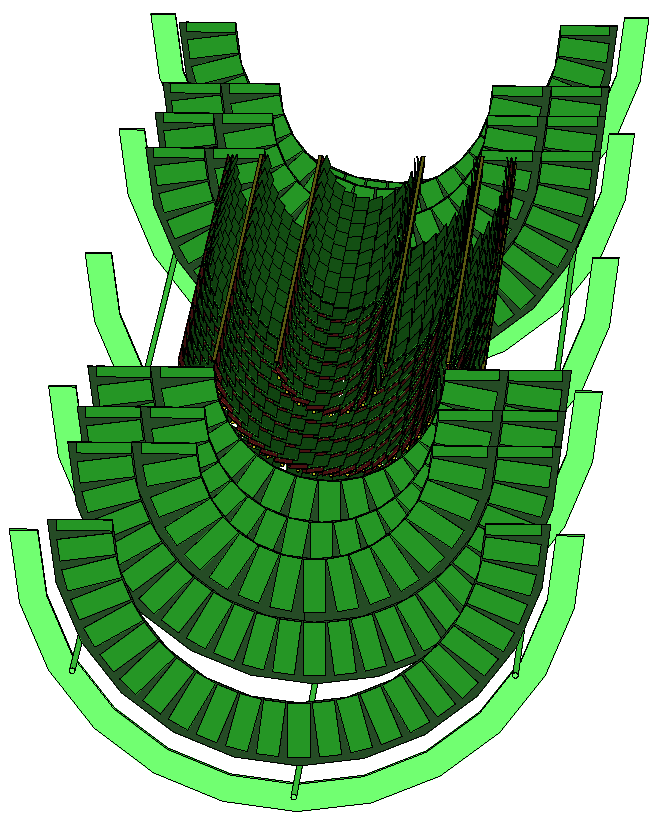
dawn g4_01.prim
../bin/$G4SYSTEM/A01app
/vis/open DAWNFILE
/vis/scene/create
/vis/scene/add/volume
/vis/sceneHandler/attach
/vis/viewer/flush
/vis/scene/add/trajectories
/vis/scene/add/hits
/tracking/storeTrajectory 1
/run/beamOn 1