
Geant4 Workshop Visualization Tutorial using the OpenGL Event Display
This tutorial has been updated for use at the October 2003
Fermilab Geant4 Tutorial, but is also designed for use by anyone else who wants to learn
OpenGL Visualization for Geant4.
This tutorial can be used on its own, but gives the most comprehensive introduction to
Geant4 visualization when used as part of the following full set of documents:
While some Geant4 visualization drivers are always included by default in your Geant4 build
(because they require no external libraries), OpenGL is not included by default.
You must explicitly add OpenGL to your build by setting an environment variable and then
remaking.
At the time of this writing, OpenGL for Geant4 only works on Linux, not Windows.
But stay tuned for updates - that situation is likely to change soon (OpenGL is included
as part of the Windows operating system, but Geant4's OpenGL driver is not correctly
designed yet to take advantage of that version).
OpenGL is a standard Linux system component, and should be part of the RedHat or Debian
distribution, so you probably already have it installed.
The pre-built Geant4 that you used in an earlier tutorial does not include OpenGL.
This is done both to make the pre-built version more portable and to make the pre-built version
able to run with JAIDA/JAS. Unfortunately, you cannot run JAIDA/JAS if OpenGL is in your build.
-
The problem is that the OpenGL libraries pre-load the library libXt.so which makes the Java virtual
machine crash when it tries to open its first Window - expect a fix when JDK 1.5 comes out.
-
For now, you can run Geant4 with either JAIDA/JAS or OpenGL, but you cannot run with both at the same time.
Geant4 has several different modes in which it can run OpenGL.
We will just show you one mode, the easiest to get started, but you may later want to experiment with the
other powerful modes.
-
OpenGLX runs OpenGL in the "Immediate" mode. This mode draws directly to the screen, using the minimum
amount of memory (important for very complex images). The drawback is that if you cover the image with
another window, when you uncover the image it will not reappear (until you trigger a new draw from Geant4).
-
OpenGLSX runs OpenGL in "Display List" (double buffered) mode. This uses more memory, but it allows XWindows
to redraw the image automatically if you cover and then uncover the window.
-
OpenGLXM runs OpenGL in "Immediate" mode and also includes a Motif interface which allows you to graphically
control the image rotation, etc. It requires additional (Motif) libraries on your machine.
-
OpenGLSXM runs OpenGL in "Display List" mode and also includes a Motif interface which allows you to graphically
control the image rotation, etc. It requires additional (Motif) libraries on your machine.
For details on using these other OpenGL modes (necessary libraries, environment variables, etc.), see the
Geant4 Visualization README file:
geant4/source/visualisation/README
Set some environment variables before you rebuild Geant4:
You now have the correct environment to rebuild Geant4 with OpenGL (and without JAIDA/JAS).
Now for the easy part. Since OpenGL runs directly from Geant4, you just start Geant4
and then issue a few visualization commands.
-
We will show how to run with the examples/extended/analysis/A01 example, but the same
set of commands will work to visualize any example (always assuming you have correctly
set the envirnment variables as described above).
-
Remember that, even if you didn't set it at build time, you must at least set the
following environment variable at run time:
setenv G4VIS_USE_OPENGLX 1
-
Also, this might be good time to check that your xwindows setup is correct for our purposes.
-
If you are running Geant4 on a remote machine (using the machine in front of you just as a terminal),
make sure you have your XWindows client running.
-
Make sure your terminal is correctly set to accept connections from the machine where you are running Geant4.
-
You might need to explicitly set display from the machine on which you are running Geant4 to make it display
to you terminal.
-
It is beyond the scope if this tutorial to advise on all XWindows problems, but it is always helpful
to try a test with a simple application such as xclock.
-
Run the example:
   cd /path/to/A01
   ../bin/$G4SYSTEM/A01app
The first part of the response from Geant4 will include a list of currently
available graphics drivers. Make sure it includes "OpenGLImmediateX (OGLIX)".
If it doesn't, your environment variables were not set correct at build or run time:
**********************************************
 Geant4 version $Name: geant4-05-02-ref-00 $
                                (27-June-2003)
             Copyright : Geant4 Collaboration
**********************************************
Visualization Manager instantiating...
Visualization Manager initialising...
Registering graphics systems...

You have successfully chosen to use the following graphics systems.
Current available graphics systems are:
  ASCIITree (ATree)
  DAWNFILE (DAWNFILE)
  GAGTree (GAGTree)
  G4HepRepFile (HepRepFile)
  G4HepRep (HepRepXML)
  RayTracer (RayTracer)
  VRML1FILE (VRML1FILE)
  VRML2FILE (VRML2FILE)
  OpenGLImmediateX (OGLIX)
  OpenGLStoredX (OGLSX)
G4's response will end with:
******************************************
**                                      **
** Using standard Geant4 transportation **
**                                      **
******************************************
Idle
-
Open the visualization driver:
/vis/open OGLIX
A graphics window should appear as follows
(if no window appears, check whether there is a problem with your XWindows setup.
Consider some of the relevant hints above):
-
Create a new, empty scene, attach a scene to the scenehandler and declare that the world volume should
be added to the scene. Be sure to get the correct, mix-case spelling of "sceneHandler" in the second command:
   /vis/scene/create
   /vis/scene/add/volume
   /vis/sceneHandler/attach
By the way, if you reverse the order of those last two commands, it will still work, but the second command
will then give you the following error message which is really just a warning that nothing has yet been filled
into the scene.
   ERROR: G4VSceneHandler::ProcessScene:
   No run-duration models in scene data.
-
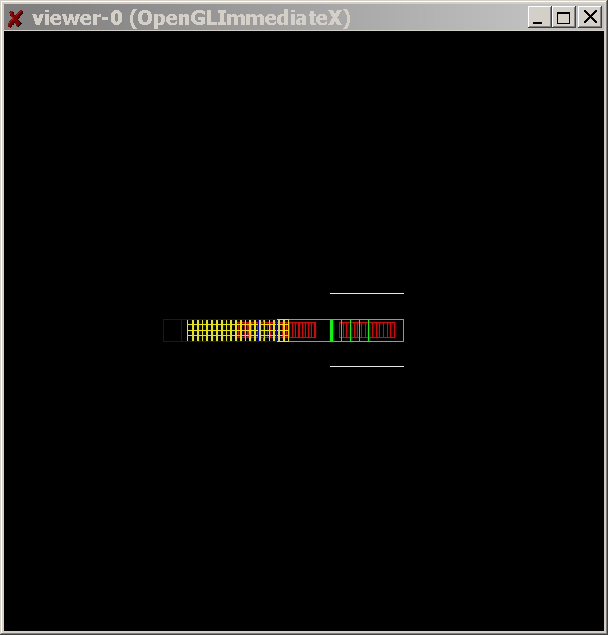
Finally, output the image:
/vis/viewer/flush
The image should appear in the OpenGL window:
-
Remember that in the OpenGL mode that we are using, "Immediate" mode, the image is drawn directly to the
screen with no Display List (backing store). This means that if the window is covered and then unconvered,
the image will not redraw. Make sure the OpenGL window is unobstructed before you issue the flush command.
You can always repeat that command to redraw the window.
-
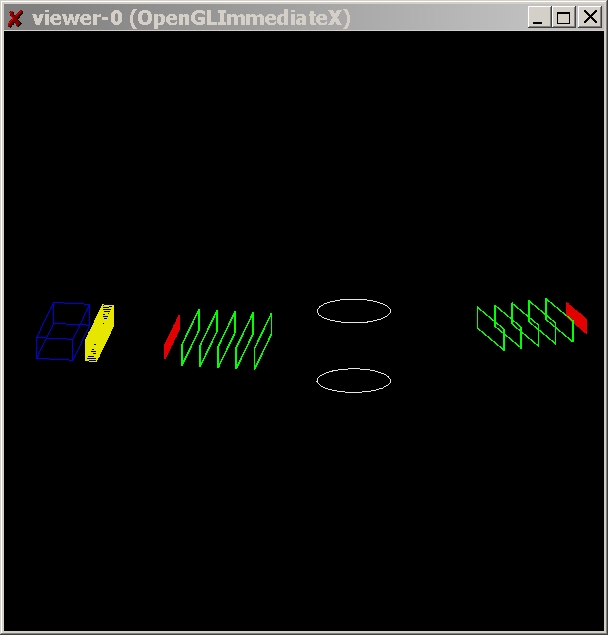
Next, change the view angle by providing a theta and phi "camera" angle (again taking care about the correct
mixed case in the command):
/vis/viewer/set/viewpointThetaPhi 70 20
-
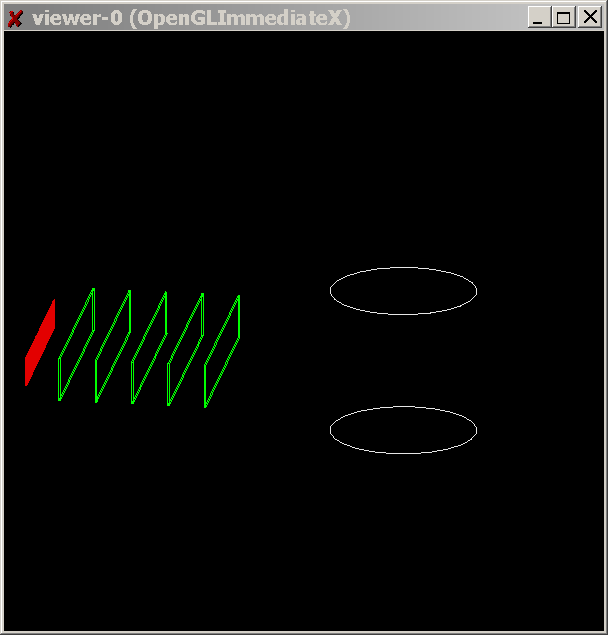
Next, zoom in by a factor of 2:
/vis/viewer/zoom 2
-
To reset to the initial default view:
/vis/viewer/reset
-
Type "help" to see a list of other available commands:
Command directory path : /
 Sub-directories :
 1) /control/   UI control commands.
 2) /units/   Available units.
 3) /geometry/   Geometry control commands.
 4) /tracking/   TrackingManager and SteppingManager control commands.
 5) /event/   EventManager control commands.
 6) /run/   Run control commands.
 7) /random/   Random number status control commands.
 8) /particle/   Particle control commands.
 9) /process/   Process Table control commands.
 10) /vis/   Visualization commands.
 11) /mydet/   A01 detector setup control commands.
 12) /hits/   Sensitive detectors and Hits
 13) /gun/   Particle Gun control commands.
 Commands :

Type the number ( 0:end, -n:n level back ) :
Navigate the help system by typing in the numbers that correspond to the various commands.
Item 10 gives the visualization commands.
And then item 6 gives the viewer commands:
Guidance :
Operations on Geant4 viewers.

 Sub-directories :
 1) /vis/viewer/set/   Set view parameters of current viewer.
 Commands :
 2) clear * /vis/viewer/clear []
 3) create * /vis/viewer/create  [] [] []
 4) dolly * /vis/viewer/dolly [] []
 5) dollyTo * /vis/viewer/dollyTo [] []
 6) flush * /vis/viewer/flush []
 7) lightsThetaPhi * /vis/viewer/lightsThetaPhi  [] [] [deg|rad]
 8) lightsVector * /vis/viewer/lightsVector  [] [] []
 9) list * /vis/viewer/list [] []
 10) pan * /vis/viewer/pan [] [] []
 11) panTo * /vis/viewer/panTo [] [] []
 12) refresh * /vis/viewer/refresh []
 13) remove * /vis/viewer/remove
 14) reset * /vis/viewer/reset []
 15) select * /vis/viewer/select
 16) update * /vis/viewer/update []
 17) show * Synonym for "/vis/viewer/update" - see that command for guidance.
 18) viewpointThetaPhi * /vis/viewer/viewpointThetaPhi  [] [] [deg|r
ad]
 19) viewpointVector * /vis/viewer/viewpointVector  [] [] []
 20) zoom * /vis/viewer/zoom []
 21) zoomTo * /vis/viewer/zoomTo []
-
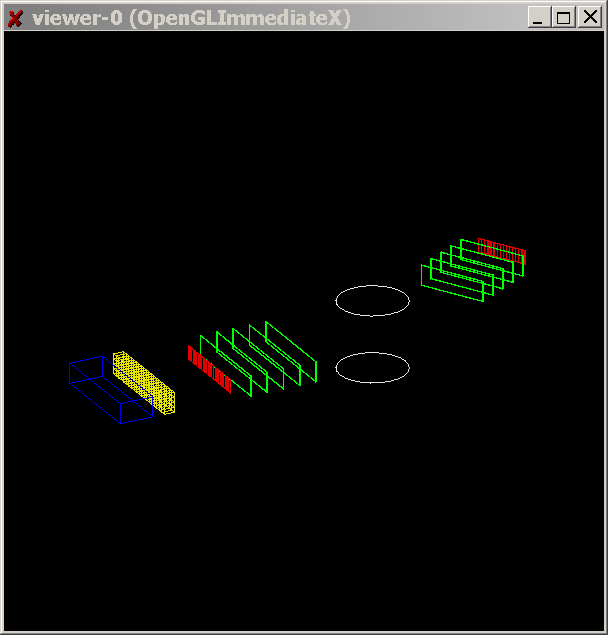
Try another view:
/vis/viewer/set/viewpointThetaPhi 40 40
-
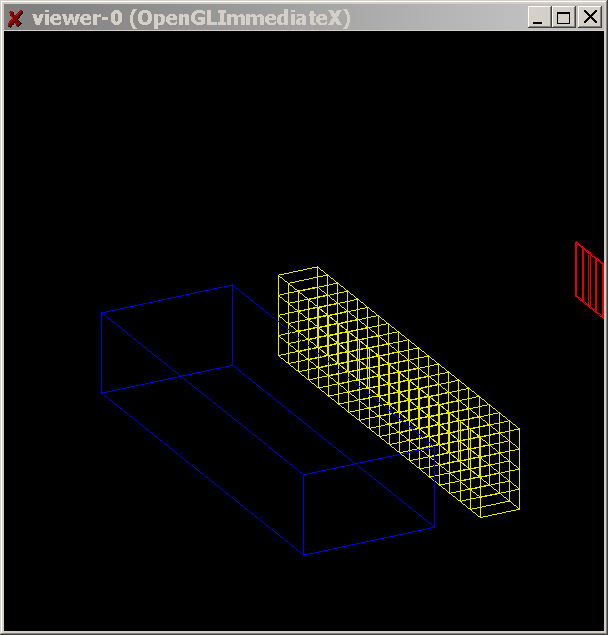
Then change the center using the pan command and zoom in a factor of 4:
   /vis/viewer/panTo -5 -1
   /vis/viewer/zoom 4.
-
So far, we have just looked at detector geometry. Now lets add some particles.
Declare that trajectories and hits should be added to the scene (previously we only
had /vis/scene/add/volume):
   /vis/scene/add/trajectories
   /vis/scene/add/hits
-
Declare that particle trajectories should be stored (otherwise they are already
deleted by the time the visualization system gets a change to show them):
/tracking/storeTrajectory 1
-
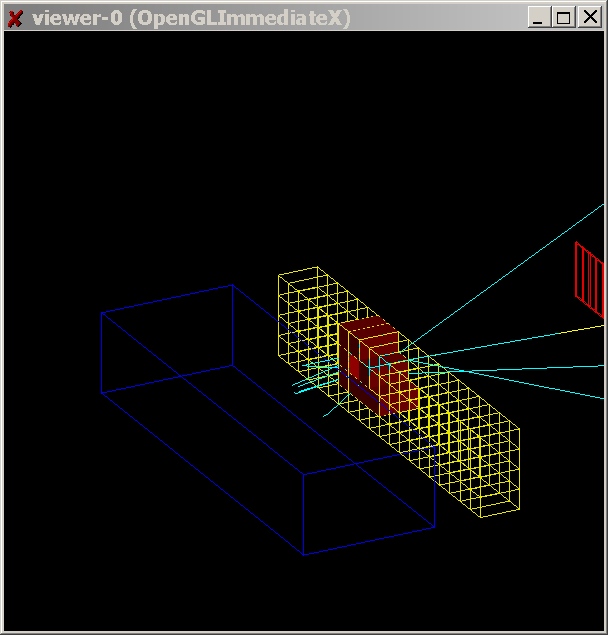
Run the beam:
/run/beamOn 1
-
The output appears as soon as the /run/beamOn is complete since an update command is included in
this example's RunAction class. If you run some other example and find that the event doesn't
draw automatically at the end of the run, just issue the following command:
/vis/viewer/flush
-
You can even put this command into a macro file and then cause this macro to be called at the end
of each event by adding the macro name to the run command, as in:
/run/beamOn 1 my.mac
-
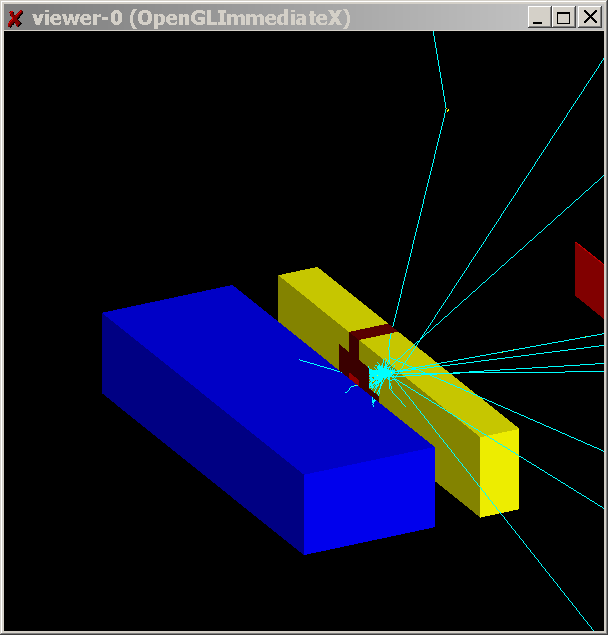
One last command for this quick tutorial. You will have noticed in the previous image
that the detector was drawn as a wireframe.
Change this now by issuing the following command:
   /vis/viewer/set/style surface
   /run/beamOn 1
The detector will then appear as a solid (though it is somewhat transparent, allowing you
to still seee the tracks passing within).
-
You can change this back with:
   /vis/viewer/set/style wireframe
   /run/beamOn 1
Notice that the style command does not affect the hits. They are always drawn as surfaces
because of code in the relevant c++ classes (which override any style commands
issued at run time):
   src/A01EmCalorimeterHit.cc:  attribs.SetForceSolid(true);
   src/A01HadCalorimeterHit.cc: attribs.SetForceSolid(true);
   src/A01HodoscopeHit.cc:      attribs.SetForceSolid(true);
-
Geant4 visualization for OpenGL has many more options that you can best learn by playing around.
If you get confused about the current view, just remember that you can reset with:
/vis/viewer/reset
-
This tutorial has only scratched the surface of Geant4's OpenGL capabilities.
As mentioned above,
Geant4 has three other modes in which you can run OpenGL: "Display List,"
"Immediate plus Motif" and "Immediate plus Display List".
This tutorial was meant only to give you a brief, hands on introduction to this powerful tool
and to encourage you to further explore its abilities.
For the most complete information on OpenGL for Geant4, see the Geant4 Visualization README file:
geant4/source/visualisation/README
-
And for futher information on OpenGL and Mesa, see:
http://www.opengl.org/
http://www.mesa3d.org
If you need to quickly get back to where you were in the tutorial, it may be
helpful to cut and paste a set of commands from this list:
../bin/$G4SYSTEM/A01app
/vis/open OGLIX
/vis/scene/create
/vis/scene/add/volume
/vis/sceneHandler/attach
/vis/viewer/flush
/vis/viewer/set/viewpointThetaPhi 70 20
/vis/viewer/zoom 2
/vis/viewer/reset
/vis/viewer/set/viewpointThetaPhi 40 40
/vis/viewer/panTo -5 -1
/vis/viewer/zoom 4.
/vis/scene/add/trajectories
/vis/scene/add/hits
/tracking/storeTrajectory 1
/run/beamOn 1
/vis/viewer/set/style surface
/run/beamOn 1
/vis/viewer/set/style wireframe
/run/beamOn 1
Joseph Perl
14 October 2003


